Friday, December 16, 2011

Storm Of Vengeance, Devastator Squad Heman

Hey all, this squad got done alot earlier than expected cause work has been a bit slow this week, so was able to squeeze in a bit more time than I normally could. I also felt as if my highlights are fairly decent on these guys as they were brand new right off the sprue where as my other Dark Angel figures have been recycled several times. I also used instamold again to make a shoulder icon (and save some $$$$)

This stuff is truly amazing and so fast!!! I highly recommend it to anyone wanting to do simple model upgrades.. it does get a bit harder the more complex molds you try to make, but trial and error i feel is a good thing.
So without further ado, here we go...

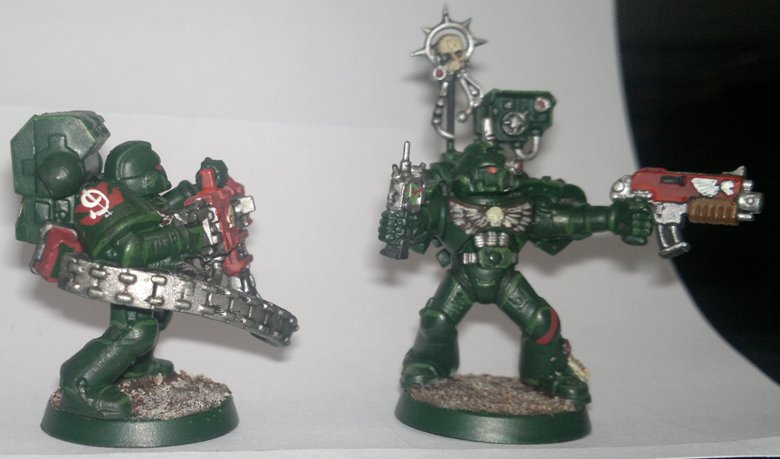
Here is Brother Sergeant Heman (not to be confused with He Man!) and a lowly unnamed Heavy Bolter squadmate...


more (unnamed) Heavy Weapon Specialists...


and finally, here is the rest of the Battle Brothers.


Next up, a LandSpeeder and just ordered another tactical squad and then I am calling it all good. That will bring my point level to 1165 exactly, which i am calling good and hope will be enough!
Any of you other Storm Of Vengeance attendies have blogs where you've showcased you DA's for this event? Would love to see em!
Cheers,
Brose

Monday, December 12, 2011

Preparing for Storm of Vengeance at Adepticon Assault Squad Zaltys

Personally, i would ask to get transferred out of Squad Zaltys, just cause i can't stand that name ;)
anyhow, next up, Assault Squad Zaltys


really really overcast today, so sorry bout the slightly bad pictures!
In the next week or so I plan to have Devastator Squad Heman complete. 2 Heavy Bolters and 2 Plasma Cannons, a complete 10 man squad.
Thats it for today!

Thursday, December 8, 2011

Trudging My Way to Adepticon

The next 4 months are going to be a very busy time. I need to build something in the range of 8 gaming tables for my Battle for Piscina IV event at Adepticon and I signed up for several events to participate in as well. One of the events I'm preparing for is the "Its How You Use It" Warhammer Fantasy Battle tournament. I chose to bring 1000 points of Tomb Kings because in a pinch I already have that many points painted. However, ideally I'd like to replace most or all of the models I have already painted. Most of my Tomb Kings were painted in the days when the Undead were all in one book and their was no differentiation between Tomb Kings and Vampire Counts. Then, somewhere around 1998 the decision was made to split the two factions. I diligently repainted my bases a sandy tone and pledged allegiance to the court of Khemri. I still have all of my random vampires, zombies, and ghouls with their uniform Goblin Green bases packed away, shunned, and forgotten but the Tomb Kings still get some love from time to time. A year ago I decided to add/drybrush a few more models and repaint their hideous shields painted around 1995 when I was about as adept at free hand painting as a 5 year old. Personally, I'm not much for drybrushing models. The technique has its place and its my roots but like 8 years ago I tried my hand at painting a skeleton meticulously - not just drybrushing it. That model has sat unfinished in foam carrying cases for the better part of the last decade waiting to be fully risen into the world. Over the last week I experimented with shield painting, redid his spear shaft, and based him with a higher contrast landscape. I'm really happy with the end result.
Above is a Skeleton Warrior most likely painted around 1995. He was painted with Brown Wash over a Skull White Primer basecoat and then dry brushed Bubonic Brown, Bleached Bone, and highlighted around the eyes with Skull White mixed with Bleached Bone. His base was changed to a Bestial Brown top with dry brushing of Vomit Brown and Bleached Bone, and the edge was painted with several coats of Vomit Brown. That was my "desert look". The shield was repainted last year to try and emulate the how I envisioned the shields on the cover of the original Tomb Kings book if there wasn't the ever present orange haze.
This is the meticulously highlighted Skeleton Warrior I started painting like 8 years ago. Similar to the original skeleton he began with Brown Ink over a Skull White Primer base coat. The model was then painted Bleached Bone in successive thin layers to build up a solid coat while leaving the Brown Ink in the recesses. Highlights of Bleached Bone mixed with Skull White, and then pure Skull White were put on again in successive thin layers. The spear shaft is Red Gore with the texture highlighted with Blood Red. Its fairly subtle. The gold accents began as a base coat of Tin Bitz and then was highlighted with Shining Gold and then Shining Gold mixed with Mithril Silver. The shield face itself began as a solid coat of Bleached Bone. Then the edges of the metal, the bottom edge, and the gouges got thin washes of Devlan Mud. Thin watery streaks of Bleached Bone were used to blend the Devlan Mud into the base tone. Then Skull White was painted on in thin watery streaks building up a solid tone and blending the darker lower area of the shield into the brighter top half of the shield. It was a lot of work the first time out but now I think it'll go really fast in the future. Finally hieroglyphics were added using Chaos Black at the very end. The base is Scorched Brown with dry brushed highlights of Shadow Grey, Iyanden Dark Sun, and Bleached Bone. The edge is Scorched Brown.

This adds one more model to my total model count for the year. Also, this week I received a Necrosphynx/War Sphinx in the mail. I still haven't committed to which it will be. The points are roughly the same. Anyone have any feelings on one vs the other?

Thursday, December 1, 2011

If Ya Want Sumfin' Done... Part 1

The Purging of Kadillus by Gav Thorpe skips over the opening engagements between the forces of Ghazghkull Thraka and the combined resistance of the Piscina Free Militia and the 3rd Company of the Dark Angels. At the end of the Prologue, Tauno is on watch and sees a dust cloud approaching Kadillus Harbour and after readjusting his magnoculars multiple times discovers that there are endless columns of Orks approaching on foot. He then promptly drops his magnoculars like a chump. The book picks up with the 1st chapter being The Tale of Boreas: Dark Cathedral. This is a great snapshot of what is referred to as "Ghazghkull's War" in the original Storm of Vengeance campaign pack from 1997, but it skips over the whole opening engagement.

SoV (Storm of Vengeance) also ignores much of that initial onslaught but it does kick things off with If Ya Want Sumfin' Done, a scenario where Ghazghkull lays claim to a coveted objective that the Imperial forces do not understand the significance of at the time. A small elite force of Orks led by Ghazghkull himself breaks away from the main assault on the city to seize a small geothermal plant inside the northeastern end of Kadillus Harbour. Master Chaplain Uriel and Lexicanum Charon move in to intercept the Ork forces but fail to hold the power plant.

This is a really important battle because it helps to set the tone: we are being overwhelmed. One of the exciting things I'll be doing with the Battle for Kadillus event is to flesh out that initial invasion of Kadillus Harbour and the bloody city fight that is alluded to but remains largely undocumented in either SoV or PoK (The Purging of Kadillus). Ghazghkull's forces surged into Kadillus Harbour and then dug themselves in once they had been cut off from reinforcements. The 3rd Company of Dark Angels and the Piscina Free Militia were unable to root them out initially, and the Orks had laid claim to key objectives like the Dark Angels Basilica, the city's orbital defenses, and of course, the geothermal plant. Though we will see tables with all of these key objectives assembled between now and April 19th, 2012, this week I began work on the table for If Ya Want Sumfin' Done...
My starting point begins with this scenario map out of SoV. As you can see it is a 4'x4' gaming area with a couple of diagonal city blocks and a couple of horizontal city blocks with the geothermal plant centrally located on the western edge, if that makes sense. Now one of my pet peeves with GW's representation of cities is that you have a bunch of free standing buildings scattered all over the place and they don't form blocks. A couple of years ago I began work on my own city table that utilized giant movement trays for the buildings themselves so that I could swap buildings in and out and so that I could set up my table in blocks. I've elected to use the same construction ideas of this table.
One of my major concerns when laying everything out is ensuring that all of the city blocks are spaced far enough apart to allow for "real" traffic but to be tight enough to block lines of sight. I decided that the ideal width between most buildings would be 2 Rhinos wide - enough space for 2 normal sized vehicles to pass each other.
Now the idea of a square movement tray to set up blocks is fairly easy to understand. You cut a bunch of squares and rectangles and put your scenery on them. In my case every base is 12" wide no matter how long it is, and it has a 1" border of sidewalk all the way around. This means that if I build scenery pieces that are 10" wide I can drop them onto my movement trays at a whim. The problem I ran into was that when setting up a table with diagonal city blocks my squares and rectangles would be hanging off the table edges; which is both unsightly and prone to people getting caught on the scenery and knocking it around. To deal with the issue I cut a variety of city block sections that are half squares or half rectangles with a 45 degree diagonal edge.
The sidewalks, as mentioned, are 1" wide. I cut them from standard foamcore and glue them down with white glue.

You will notice that I left a square gap. Scattered throughout my city blocks are 1"x1" gaps. I have left those behind so that I can put in street signs, overhead lights, or whatever other details I want that can be swapped in and out.
Just like other miniatures I put every building on a pink or blue foam insulation base. These vary in thicknesses based upon what I am doing. This allows me to incorporate basements or craters into the buildings I build and it allows me to swap scenery pieces in and out of a base as often as I like.
Here the pink foam base is cut and set inside one of my diagonal trays. You'll notice that I've cut card into 1"x1" squares and glued them down on my foamcore sidewalks to create the effect of sidewalk squares. You'll also notice that some of them have cracks or that there is an incomplete section. This is because I try to waste nothing if I can, so off cuts will eventually just become battle damaged sidewalk/curb.
Here I had an already assembled GW city building that Matt Weeks donated to my table construction efforts. Like the sidewalk there are cardstock tiles cut and glued inside and outside the scenery piece to add to the level of detail. These sorts of details will only be added to and accentuated as the process of building the table continues.
Finally here is the culmination of several hours work. All of my diagonal hard board bases are cut. I've started test fitting various pieces of scenery that have already been assembled and painted for previous projects and at least half of the table's bases for its city blocks are accounted for. Now begins the hard work of constructing and painting the buildings. These will be largely intact as its made very clear throughout SoV that damage to the geothermal plants could cause catastrophic mass destruction.

More next week.