Thursday, January 24, 2013

Adepticon WIP Table Shots

Tonight I am play testing one of the scenarios from the 40K Warzone Tournament and I went to take some photos as I set up the table and discovered my memory card was full. I guess that's reason enough for a blog post right? Here's some quick shots of things I've been up to in the last month or so.

I wanted to vary up my GW Cities of Death buildings and arches are a common theme, so I looked in my pile of junk that should be out in the alley with the other trash and I looked in my actual recycle bin and I stumbled upon the humble "cherry tomato tray". The pattern of the plastic involves a series of arches so I decided to clip them out and give them a try. They were then added to an extension that I built onto the top of a Cities of Death building. The end result looked something like this.

Tomato tray and clippers. The tray didn't stand a chance.
Arches in place.
This piece is done for now. Some washes could really add some pop though.
The gateway below, now named Dominion Gate, was actually part of a team tournament display the Nerd Night Crew (which evolved into 2ndCityWarzone) used at Adepticon some 4 years back. I added a pair of bases to elevate it even further and then gave it a little more dry brushing and washes in the recesses to give it a little more depth than it had.

Dominion Gate
Adjacent to Dominion Gate on either side are sections of park land
Dominion Park
Dominion Park
 I had a day where I was sick of looking at city terrain and felt stagnant so I packed everything up and started work on the trench boards. These shots show where the opposing trench lines will run. Circles represent where craters will be built into the board. The center diagonals represents the killing field between deployment zones. Rectangles along the trench lines will be dug outs.
Overhead of the trench layout.
Overhead of the trench layout close up on one deployment zone.
That's it for now.
-Nick

Wednesday, January 23, 2013

Wreck-Age Glamour Shots,

These photos were all taken this afternoon by Anton Zaleski, I think they came out fantastic so I'm going to post all of them even though the cart technically isn't done yet. The first two shots are of the work in progress Boar Cart and the second 3 shots are of the Weathered Storage Container.


I hope you like them.
-Nick

Wreck-Age: Weathered Storage Container and Boar Cart.

Three weeks since my last blog post? I'm slipping. Its not that I haven't been immersed in all manner of hobby activity, but I just haven't had time to blog about it.

Though a lot of that time was spent working on Adepticon tables, I've also been involved in Wreck-Age play testing of both the table top game and their RPG. With Wreck-Age on the brain it was only natural that I painted a couple of Wreck-Age models.

Today I completed their Weathered Storage Container. I put it on a base for display purposes but obviously didn't require it and is not glued to the base. The base was purchased from Dragonforge. Here's some shots of the completed model:

I glued the doors mostly open to show the grim interior.
I'm really happy with the weathering powders near the base of the container.
 I also have this Wreck-Age Caravaneer Boar Cart ready for basing and weathering. I just ordered a properly sized base for it yesterday so now I have to wait a week or two to complete it.
This cart is awaiting a properly sized base from Dragonforge.
That's it for today. I need to get back to work on my Adepticon tables and I just got all of the new Dark Angel models in the mail so I have plenty to do. Still, I cleaned up some Wreck-Age Stakers so I plan on priming a couple and setting them on the table to get worked on between projects. For the quick updates on my WIP Wreck-Age pics you can follow my WIP thread on their forum.

As always, more to come!
-Nick

Tuesday, January 1, 2013

Introspection Time 2013

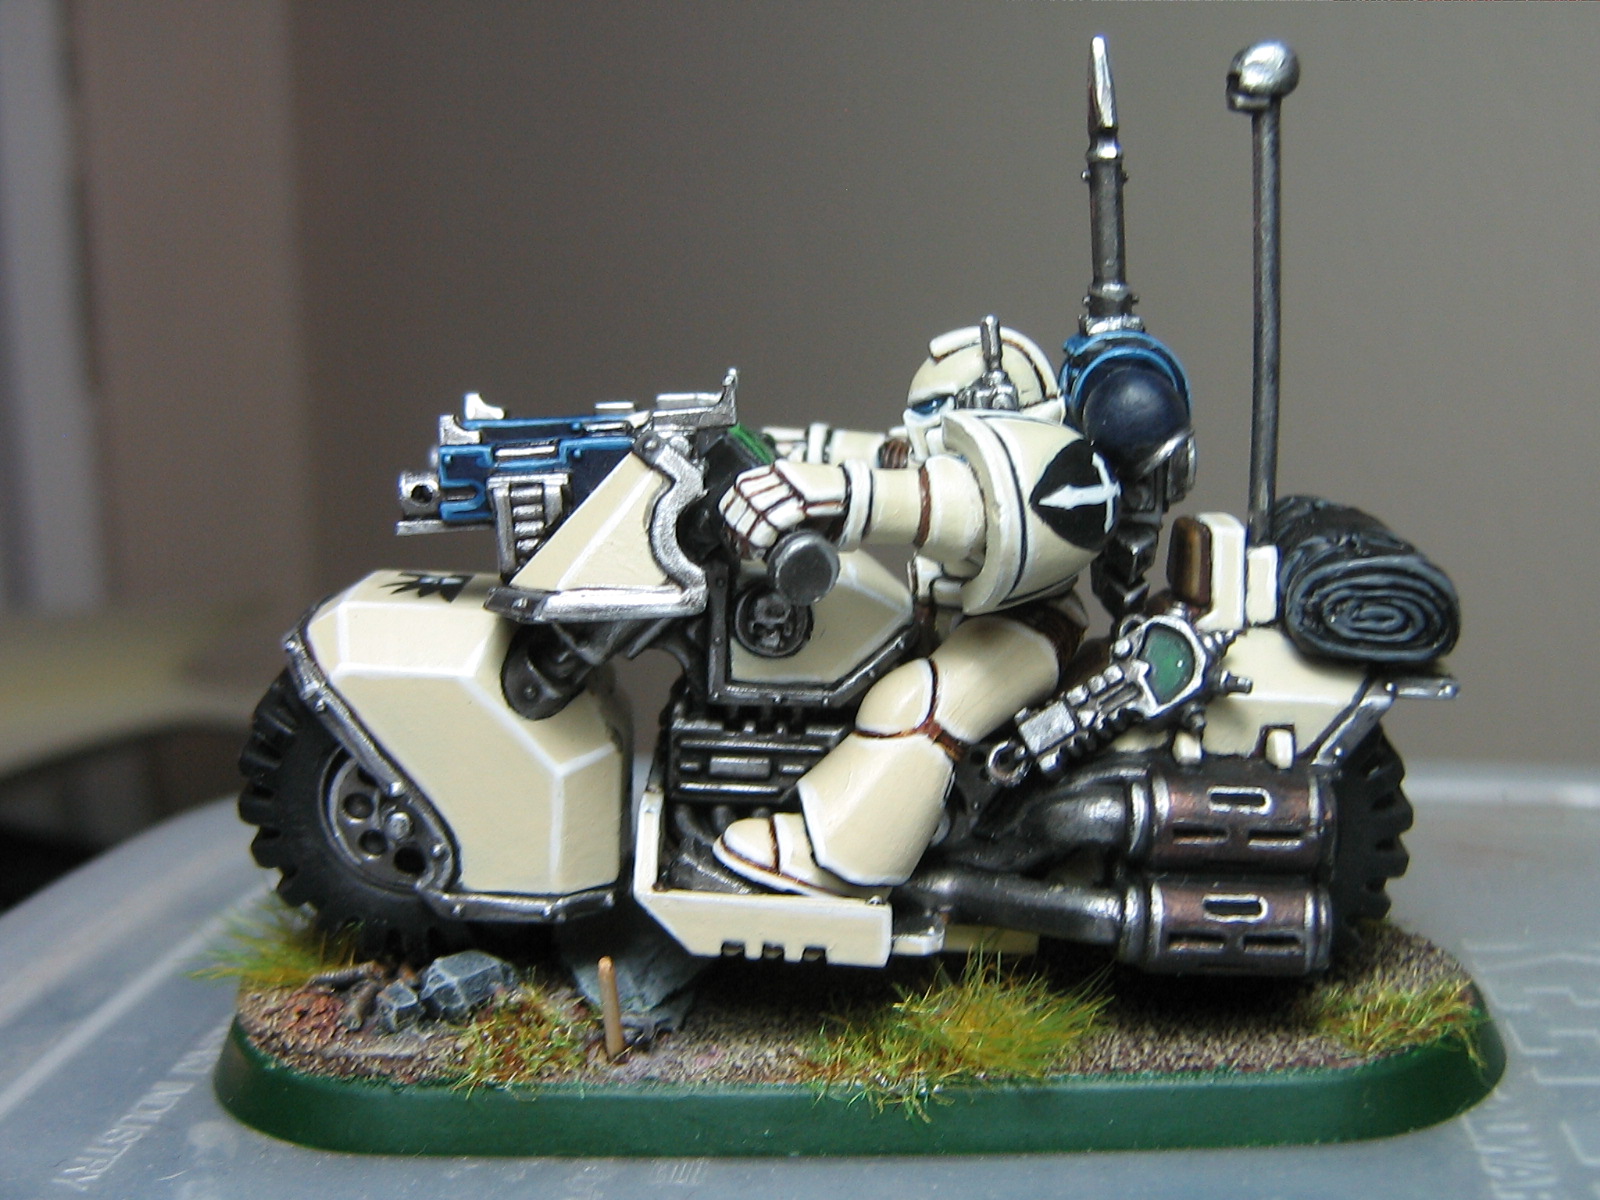
Angels of Absolution bike. One of the few models I painted in 2012.  I am frothing for that new Dark Angels Codex.
2012 was a weird hobby year. It didn't fall into the usual patterns. I was so wrapped up in preparing my event for Adepticon last year that during the months of January, February, March, and April I didn't pick up a paint brush to work on much of anything other than scenery. It was fun running my first event but I dropped the ball really hard in my opinion and set out to correct my mistakes this time around.

I didn't lay out my hobby goals until almost May. Here's what they were:

1) Go to Galactic Force Games more.
 
Through the summer/autumn and I managed to walk into Galactic Force once every 2 months and spend $10-$20 every time I've walked in. Restocking my paint collection isn't going to keep them afloat but every little bit helps. I did say I wanted to go in and possibly play a game some time, but I'm an introvert so that still hasn't happened. I do plan on buying Dark Vengeance from there at least.

2) Go to the Chicago Battle Bunker more. 

I'd say I accomplished this somewhat. I attended 3 tournaments at the Bunker this year which leads me to...

3) Attend more events. 

Seeing as I went to 3 tournaments in the last half of the year I'd consider this an accomplishment. Still, Adepticon and 3 tournaments really isn't enough to balance out my investment of money and time. I need to bump that up closer to 6 to feel good about it, or get regular home gaming established again.

4) 2000 Points of Angels of Absolution

I am stupidly close to this goal. I painted 2 out of 3 Ravenwing (Warden) Bikes and have several more almost complete. As soon as I have that Codex in my hands I intend to knock those out and get them on the table along with a bunch of other goodies. This is the year I crack 2000 points for sure.

5) Play Warhammer.

Failure. Utter failure. I even know someone I can play WFB with now and haven't. I had so much fun at the 'Its How You Use It' WFB Tournament at Adepticon I fully intended to get more games in. I better get in at least 1 game before Adepticon because I'm signed up for it again.

6) Paint Something Big!

I would call this a failure too but even though my intent was to complete something like the Caestus Assault Ram or my Ork Stompa, the Cities of Death board I've been hyper detailing should really count for something right?.  I've put a stupid amount of time into it. We'll just call it a wash and forget I ever listed this.

7) Purge My Collection

Marginal success here. In May/June I listed a lot of stuff on Ebay and paid my rent with it. That was good. I still have piles of stuff waiting to be listed though.

8) Get an Early Start on Adepticon 2013

Here's the one thing I did right this year. I started thinking about what I wanted to do in the Spring/Summer. I presented the idea to Matt Weeks in July, and then I started gathering up Stratagems from books and putting rules together in the computer. I got everything to Matt in a timely manner and I started working on tables in November. However, I am taking way too much time on the tables and need to get cracking so that I don't have a repeat of last year where I'm slopping paint onto things moments before I load the tables into the car.

I did have some cool hobby accomplishments this year that weren't part of my goals. I took home a Painting Award at Adepticon in the Combat Patrol event and then took home 2 Painting Awards and a Sportsmanship Award across the 3 AWC events I went to at the Bunker. I don't know how that happened, but I'm pretty stoked on that. I also started helping the developers of Wreck-Age with play testing and that has been pretty rewarding.

This year I was broke so I didn't buy a lot of models. In fact, the only models I acquired this year were gifts. I got the limited edition Interrogator-Chaplain from Dark Vengeance from a friend and I own most of the Wreck-Age line for play testing. Other than paints, the only hobby supplies I've bought have been bases from Dragon Forge and Secret Weapon, along with some bitz from Spikey Bits. This year I'm going to break the bank though. I need all of those new Dark Angel kits except Belial.

I'm going to keep my goals condensed this time around. Here's what I want to accomplish in 2013:

1) Get my Angels of Absolution to a few tournaments with some of the shiny new units from the Codex.

2) Complete a unified and competitive Ork warband for Combat Patrol.

3) Attend more events/play more games.

4) Get my Adepticon tables done on time and run a cool event.

5) Paint a Stakers warband for Wreck-Age and help get them some more support and play testing.

I think that's reasonable. We'll see.

-Nick

Here's my 2012 in images:

Two of the buildings I completed for Adepticon 2012.
Wreck-Age Pack Boar
Wreck Age Dog
Angel of Absolution. 5th Company. 2nd Squad.
Angels of Absolution biker. 2nd Compay - Wardens (Ravenwing)
Angels of Absolution - Flamer.
Angels of Absolution biker with Meltagun. 2nd Company - Wardens (Ravenwing)
Converted Angels of Absolution Pintle-Mounted "Dual Stormbolter". 
Hyper detailed Cities of Death board with building "movement trays".

Saturday, December 29, 2012

Building a Better City from the Ground Up Part 2

In the last article I talked about how I've wanted to take the Cities of Death experience and make it feel more like you're battling in an actual city rather than a haphazard maze of buildings and detritus. I started off the project by discussing the movement trays that I built to contain my buildings. Today I'm working on painting some of those movement trays so lets take a look. Now I will note that this is all probably much easier with an airbrush but since my first attempt airbrushing something a few years ago was a complete failure, I haven't touched it since. Instead, I do layers of over brushing and dry brushing combined with washes to create the look of my sidewalks. Here's a quick overview:
To start I painted the entire base with black paint. I did this by hand because spray paint would melt my exposed foamcore sides.
Next I over brushed dark grey. I used Americana brand Graphite colored craft paint. Essentially its Abaddon Black mixed with a lighter grey.
 Next I dry brushed Apple Barrel brand Blue Stoneware over that. Think something along the lines of The Fang - a dark blue/grey.
Then I dry brushed again with Apple Barrel brand Country Grey. This is more of a black based grey akin to Dawnstone or Administratum Grey.
This next layer was a mix of a bunch of colors to approximate Bleached Bone/Ushabti Bone.
To help pick out the sidewalk blocks and add a level of realism I washed Gryphonne Sepia into the cracks though any brown wash would do.
To strengthen that definition and add more detail to the gravel patches I then washed the cracks and gravel with Badab Black/Nuln Oil.It should be noted that the dark grey dome will get hit with some sort of metallic and highlighted but this movement tray is essentially done. 
This is the layout of this particular tournament board. As you can see there are an assortment of different sized trays in various states of completion. Essentially there are two that need the full treatment starting with over brushing/dry brushing, and the rest just need various levels of detailing.
Here's a close-up of a major intersection. The two lane highway has Imperial Eagle decals for added effect, and the narrower street actually has little red arrow decals to show the direction of traffic. The crosswalks and lane dividers are not actually painted on either. They are strips of card stock I glued down because I didn't feel like messing with stenciling them on. To blend it all together various greys were stippled over the lines and decals.
You'll notice in these pictures shading in the gutters. I washed Badab Black along the gutters and added some random staining in the streets. As I work along other splashes of black, brown, and green wash will be added to represent various types of street filth. 
What do you think so far? Does it feel more like a cityscape?

In part 3 I'll talk about detailing the buildings and stretching the value of your Cities of Death buildings. Thanks for reading. -Nick

Sunday, December 16, 2012

Reblog: Building a Better City From the Ground Up Part 1


In May of 2009 I composed this blog post and took the below photos. It was supposed to be Part 1 of a series of articles on getting the most out of Cities of Death terrain and attempting to truly capture the "city feel" that I think most city boards lack. Not surprisingly because I work so slowly, I never composed a Part 2 to this article. I've still be working on this concept off and on for 3 years now and as I prepare the 4 Cities of Death boards needed for the 40K Warzone Tournament at Adepticon, I figured I'd resurrect this post rather than rewrite it all over again, starting with the original intro.

The spectacle of the game is one of the most important things to me. As such, city fighting has fantastic opportunities for stunning visuals. One of the principle visual hang ups I have with most city boards is that they don't take into account city blocks and roads. Instead, the board is a haphazard collection of buildings randomly spaced about creating a maze of totally irregular fire lanes. These boards are very suitable for game play but they just don't convey the same feel I get from walking the streets of Chicago.

When I am out and about I think about terrain a lot. I look at the architecture around me and I pick out details that can be translated into the game board. After much analysis I decided that my randomly sized city buildings, however nice, were no longer suitable as they were. I needed to create city blocks. The solution I came up with was movement trays for my buildings. Though I'm actually a lot further along in the process of making these city blocks, I have only really spent the last couple of days detailing out the city block movement trays themselves so I took some step by step photos.
The above picture shows a piece of 1/8" masonite or hardboard cut to 24"x12". My city blocks currently are in 24"x12" and 12"x12" sections to start. To frame in the movement try I have applied strips of 1" wide foam core. You will also notice the 1"x1" gap in this photo. That space was left so that I can later create 1"x1" bases for sign posts, street lamps, statues, and the like.
The next picture is a close up of the sidewalk tiling. I cut 1"x1" squares out of card stock and glued them down. Sidewalks are rarely perfect so every so often I cut the 1" square into 2-3 pieces and glued them down to create cracks in the sidewalk.
This corner is heavily damaged. I actually am running low on foam core so I used some scraps that were not perfect. In beat up older neighborhoods like mine, cement this busted up happens occasionally. In the grim darkness of the 41st millennium where there is only war, I'm sure its the norm. You might notice I threw in some sprue offcuts under the sand.
Another broken section of sidewalk - again with sprue offcuts. Notice how I didn't let the sand extend onto the bare masonite in the center as that would prevent the buildings from sitting flat.
Its the little details that bring a piece of scenery to life. This random piece of plastic I beam that was laying on the table was promptly glued down onto the sidewalk when I saw it sitting there. After it sat for a moment I went back, added a bit more watered down white glue and sprinkled some sand around it.
In one of my terrain boxes I have an old Soy Yogurt cut labeled "dome things". This random plastic "dome" was glued down to represent some sort of waste water access. Again, just a sparse sprinkle of sand was added around it.
Here is a photo of the movement try with it filled with buildings. The fit was a little snug so the two large Chicago style "3 flats" a leaning out. I need to trim the ruined building at the end like 1/16" to take that pressure off. You will notice a couple of rings. Those are man holes. I have another Soy Yogurt cup labeled "ring things" and these metal rings were glued down and then card stock circles were glued into the center of each as covers.Here's the same block shot from the left. The large ruin was a building made before I standardized the bases for the movement trays so I literally glued the hardboard base onto a properly sized pink foam base and added sidewalk tiling to make it seem like the it was actually deliberate.
I don't want to get into the manufacture of the specific buildings in this first part of the article but I wanted to show how each of the building sections is on a semi-standardized base that is then dropped onto the movement tray, allowing for different looking city blocks to be set up each time.In my Chicago neighborhood there are vacant lots interspersed between buildings on most blocks. Some of them are makeshift parks or community gardens and others are just overgrown detritus collectors. Sometimes they are fenced in, sometimes there are walls, and other times they are wide open. This represents what was likely once one of the nicer vacant lots on the block - probably a community garden or tiny park.When placed together you can see how the movement tray creates a more genuine looking city block.

Okay, so that's pretty much it from the original article. Part 2 will continue onward with the "From the Ground Up" and focus more on the movement trays themselves as they are base coated, painted, and laid out on the board along with thoughts on the streets themselves.
.
Thanks for reading. xNickBaranx

Thursday, December 13, 2012

Overwhelmed by Projects: Adepticon and Wreck-Age

I've been really quiet lately but it hasn't been because I haven't been hobby-ing it up. I actually have been so buried in projects that finding time to blog about it all has been difficult.

Here's a quick run down of what's going on...

Adepticon
Base coating building movement trays for the city buildings. The borders are strips that are separated into 1"x1" sidewalk blocks.
Most of my time lately has been spent on preparing for Adepticon - specifically the 40K Warzone Tournament. I had started work fleshing out the rules and gathering the stratagems I wanted to use as far back as July, but then I needed something functional submitted to Mr. Matt Weeks for them to post up. I'm pleased with myself because the event I ran last year I was still working everything out up right up until Adepticon weekend. This year I had the main body of work submitted before most everyone else. You can see the complete tournament rules and a sample scenario here:

40K Warzone Tournament Rules

By the end of January I'd like to have the complete scenarios up as well as the special rules for each table. The 40K Warzone Tournament is largely about battling under unique and interesting conditions that you don't encounter in a standard game. I want people to be able to show up and have a fun time and not be blindsided by a bunch of special rules or random charts they weren't prepared for so I want everything available to the players in advance.

In addition to all of the nuts and bolts aspects of the event I am attempting to provide all of the tables and scenery for the event. Luckily I have a foundation built up between my personal tables and the tables I started making for last year's event so I should be in good shape - I hope.

Once all of that essential stuff is out of the way, then I can start working on my Orks and Tomb Kings for the two events I'm signed up to play in - 40K Combat Patrol and Warhammer Fantasy It's How You Use It.

Wreck-Age

Long time readers will know that I've painted a few Wreck-Age models. The guys at Hyacinth Games live 4 blocks away from me and I've known them for years. Crunch time is upon them to crank out their debut edition of the game so they've been coming over weekly to do some play testing of scenarios and to discuss mechanics and the like. I've really been enjoying myself. I've always been a rule tinker and I'm excited to lend my input and time to help them get their game off the ground. Here's some game shots from this week (Note: This is my scenery but not my models.):
Staker Outrider scanning the darkness for my Drifter scum during a Night Raid mission.
One of my Bacon Bombs barrels passed his Staker Guard and assail the Staker Outpost, only to meander about in blind boar rage because the Drifter Handler was gunned down before he could press the detonator. 
Expect a lot more info and photos as the countdown to Adepticon progresses - that is if I can find the time to blog between projects.

-Nick

PS. If you missed it check out my guest editorial on BoLS that ran last Friday December 7th. Some Tournament Organizers and players want the tournament circuit to play under strict adherence to the "Eternal War" portion of the 40K rule book and others want to completely strip out the randomness that is somewhat common place in 6th Edition. People refer to these camps of thought as "True 6th Edition" and "40K 5.1". I think both camps are engaging in some half baked zealotry. I've always liked tournaments for new scenarios, awesome tables, beautiful armies, and unique experiences so trying to get everyone to support one camp or the other just seems wrong, so I spoke up about it. Enjoy!

The Search for "True 6th Edition"