Monday, September 21, 2009

Death Guard part I

Hello all,
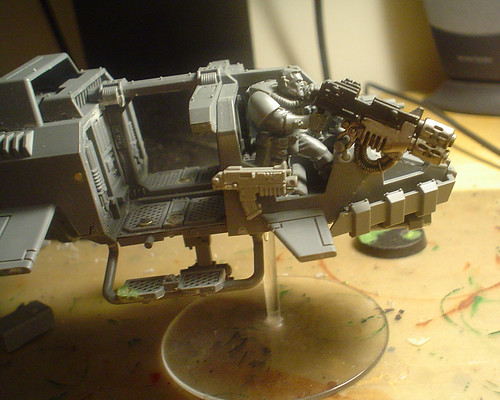
Yes its been a while for all of us here at second city but summer is drawing to a end and modeling/painting/playing will hopefully be happening more often, which will mean more post here! Anyhow, I still have not finished my landspeeder storm nor the scouts that accompanied it, but I finally managed to make it to the oak park store to get some primer and get going on em. On a side note, actually the reason I went to Oak Park was because I had gotten a no subject email by someone named whatsnewtoday, normally I would have just deleted it as spam, but it was early so I clicked on it and I am glad I did. It turns out it was an email for GW UK saying that I had won a free Battleforce just for adding Oak Park as 'My Store' on the GW site. Well I gotta say I was surprised and a little bit skeptical too! So I headed on in and showed em the email and sure enough it was legit. I really have no need for any of the models in any of the Battleforce boxes so after chatting it up with (Joe) and looking at the available Battleforce boxes some more I decided to just ask if I could wait for the release of the Space Wolves one and come claim my prize then, he had to make a call to some (probably inquisitioner or commissar) unknown person and after a bit of a wait he said it was a go! Sweet, all I really want is the drop pod but I am sure that some of the SW spures will be cool too.
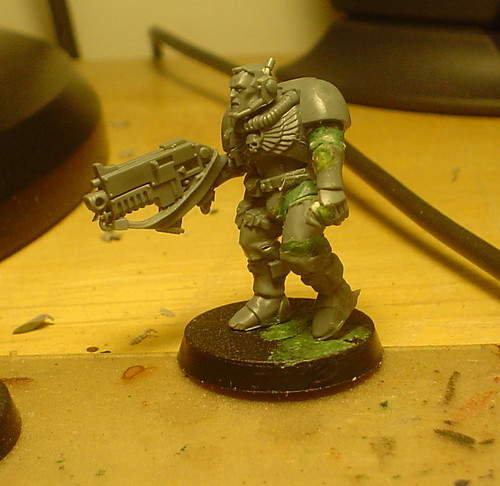
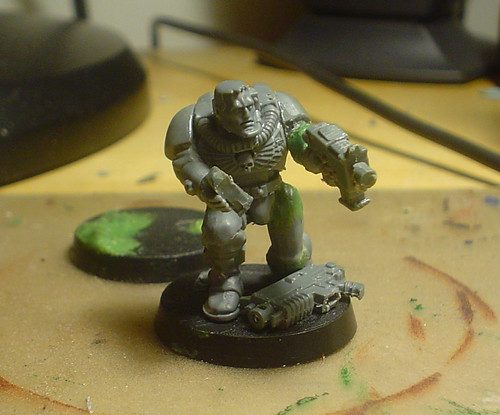
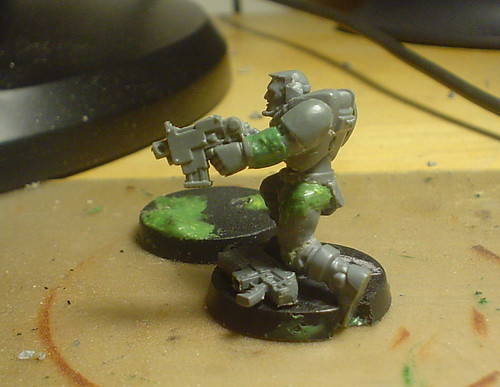
Lets see, well as the title of this post says, this is my first Death Guard modeling post. I've been really excited about getting together a Nurgle Army for a while now and ended up trading some stuff for the 7 man box. I really also decided that I was not so into chaos that I was going to spend an enormous amount of time on em either, so after some googling I managed to come across someones post on Bolter and Chainsword that provided some super quick and easy painting tips for Death Guard. I really like the first go at em. I was able to do all 7 in a couple hours time. granted there will be some additional highlighting and such but for the most part the are almost tabletop ready so here are a couple pictures. Flash does not do them justice either....
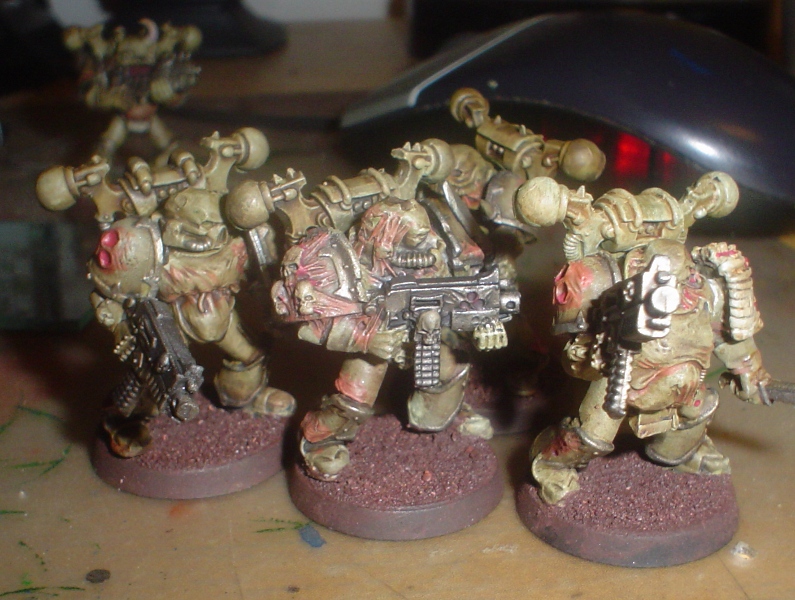
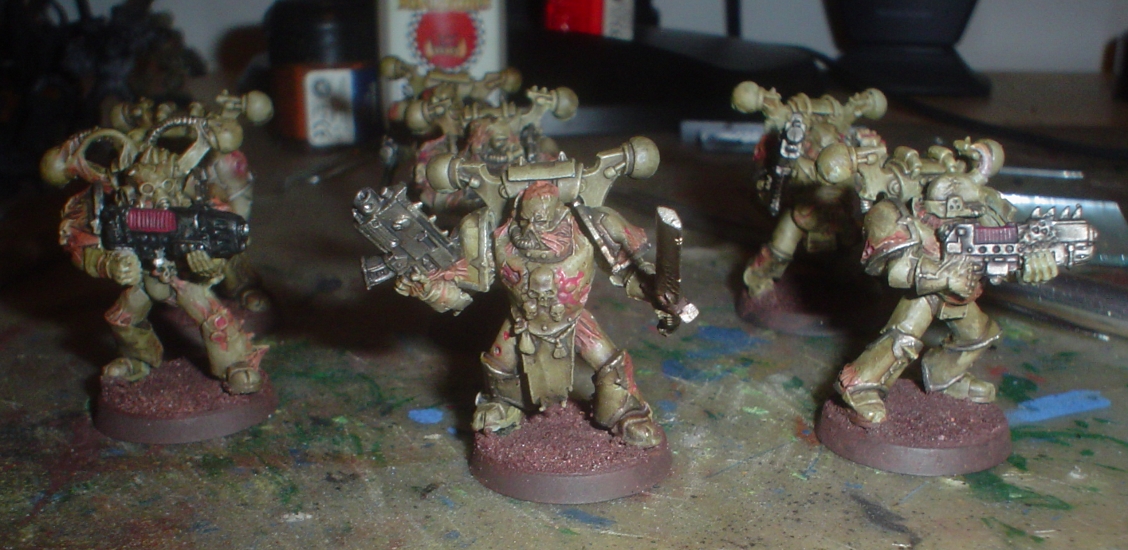


(Thanks Matt) for the SW Rhinos.... and sorry they are being so horrendously mutated by Nurgle!
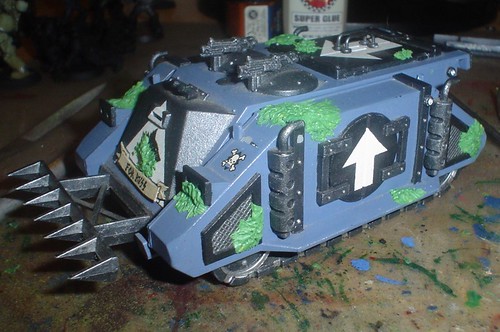


here is where things get a bit sketchy... Yes I am making Death Guard Berzerkers... I want to be able to have the best of all chaos gods yet maintain a consistent looking army, will probably get shit for these but whatever I like em...


Well will post more and I get more done.
-Brose

Friday, September 11, 2009

With a Little Help from Our Friends...


The summer has been pretty slow here at 2nd City Warzone, but I suspect as the temperatures cool, more of us will be indoors, huddled over our painting tables.

In the meantime, I don't want our loyal followers to be without some content. Luckily, our friend Art Olsen has provided us with some pics of the stuff he's been working on.

First up is Art's Valkyrie. This won the Valkyrie painting competition at the Games Workshop store in Oak Park, Illinois back when this model was released. I think the empty slots on the missile launcher are a real nice touch.


Art has also converted his own Sergent Harker model to match his Steel Legion IG army. I really like this model - Simple but effective.


Here are a couple pictures that of his army that I previously featured at Citizen Nick Hobby Center. Enjoy.


Wednesday, September 9, 2009

Happy Tzeentch Day!!


I couldn't let today pass without posting something.

So in honor of 9-9-9 day and my favorite god of chaos, I offer these Tzeentch flamers. They're not quite done. I still have to touch up some of the sloppy areas especially around the mouths.

I started these along time ago during a time when I was trying to prime with gesso. I'm not really happy with the texture or finish. I think the gesso made the final coats a lot grainier than I wanted. I know there are a lot of people who swear by it, but I think it's kinda crappy. Particularly with metal models, the gesso doesn't adhere as well as spray paint.

Anyway, I don't think I'll every be happy with these, I just hope that the next set will be better with a smoother finish.


The change of Tzeentch be with you all on this special day!

Sunday, August 2, 2009

Landspeeder Storm part II

Hey all,
did a bit more molding of the scouts for the Landspeeder Storm and thought I would post em... no more on these til they are painted up though.
Here we go..

first off i took the 'Co-pilot' and magnetized his bolter hand, the bolter itself and the storm so the he could be shooting the melta whilst flying and have his trusty bolter in easy grasp for disembarking


then easily attach the bolter when his in on his base...


There were two other guys that were buggin me, the first was the guy with his foot on the tool box, i tried making a green stuff sand bag wall at first, but didn't really like his pose still, so cut his leg apart and his left arm... everything is fresh so don't worry green stuff will be sanded and fixed up before I prime anything ;)


he still looks a little bit like a zombie too me so might play around a bit more before I am satisfied...

Next up was the guy sitting on the tool box. i really like this conversion and he still fits nicely in the storm..
first photo is a front view. I cut his right hand a bit, then cut a clip outta a bolter and attached it to this hand. Then glued the bolter without the clip on the base in front of him. I got rid of his left arm all together and replaced with a assault marine arm with bolt pistol.


i also ended up having to cut the base itself to fit his new pose, here is a side pose


still need some sanding and probably a bit more gap filling to make this one look better but i am 110% happier with this pose rather than early one of him sitting on a tool box with a bolter pointing upwards towards what enemy????
alright no more on this til they are primed and painted (which may still take a while!)
Eric

Sunday, July 26, 2009

Landspeeder Storm Part I

Alright folks, the blogs been quite as of late as we are all enjoying the mild summer in Chicago (well at least I am!) been pretty busy with trips outta town and what not so haven't really be modeling or painting much lately. One thing I have been dieing to build (doubt I will ever actually play it in a serious competitive game!) is the new land speeder storm. Finally got mine in the mail on Friday and spend what little free time I've had working on it this weekend. I recently saw a post on... honestly can't remember where i saw it, probably WarSeer or Bolter and Chainsword... any how someone else posted a nicely done storm with magnets to be able to take the scouts on and off. But I'm pretty sure (can't seem to find the original post) that their plan was to just use regular scout once the magnetized ones were 'dis embarked' from the storm... I really liked this idea but thought I would try and take it a step further and actually make bases with magnets too so that the actual Storm scouts could be used... so here we go...
First off this is a WIP... will try and take more pictures and as I touch stuff up with green stuff and all but anyhow is are the first pictures...
First up is a photo of the top view of the actual storm it self.


The picture isn't the best but hopefully you can see the 5 magnets I added. Two on each of the passenger side foot steps, two in the rear passenger section and one on the front passenger seat. First off, I am using These magnets from K and J magnets (I ended up having to use 4 other smaller ones just for stabilization purposes on two of the scouts) as the basis for this project. The magnets are small enough, yet also strong enough to hold the scouts both on the Storm and on bases.

I first assembled everything with just small amounts of glue for tacking purposes, just in case I needed to 'Change' things later on, which I am glad I did as I had to take arms and legs off more than once.
Anyhow... After assembling the scouts (which I did first) I started to build the actual storm. And as you may have noticed in the picture I left the rear passenger seats out and also cut out the rear of the 'T' top section (for a lack of a better description) This was total trial and error (with not much error thankfully)
But basically I followed the GW instructions to the T with most everything...
Once I had everything built to 'spec' and figuring out where everything was suppose to fit. I then started drilling away with first a pin vice drill and then a full on 12v drill with an 1/8th in diameter bit on it. (should have taken more photos, but i don't actually own a camera and had to borrow one for this post).
Here is the bottoms of the scouts feet with magnets in em...


Haven't had time to green stuff em but that will be easy enough..

So really it was just a bit of here is how GW says its suppose to go, now lets see how we can make em fit with magnets.. hence having to remove some of the original pieces from the Storm.

Next... here is a couple picts of the magnetized scout actually in the Storm...


Ok next up is a pict of the bases with magnets on em


Here i've added a little bit of green stuff just to make the model and the bases magnets fit together better, but pretty sure there will be much more green stuff involved before this is all done...
Lastly here is a pict of the scouts on their respective stands...


There is still some work to be done to make em look ready to be painted but wanted to at least write something here as its been too long!
Cheers and as always would appreciate feedback and or comments.
Eric

Wednesday, July 15, 2009

Epicly Epic!

I recently finished my Epic: Armageddon Blood Angels army - 10,000 points in all! I still have a little finishing work to complete, but I couldn’t resist getting started on the complimentary force…Abaddon’s Black Legion. I’ll detail my Blood Angels force as well as my ruined city table in future posts, but for now, here are a few work-in-progress photos of my Black Crusade.

Bloodletters

Chaos Space Marines with Autocannon

Plaguebearers

Bloodletters en masse

The end goal will be to produce two opposing forces (roughly 10,000 points each) and construct a series of thematic scenarios that will tell the tale of an embattled Imperial city. My current progress looks something like this:
  • Blood Angels: 10,000 points - COMPLETED
  • Imperial Titan Legion/Navy - In progress (40%)
  • Black Legion: 10,000 points - In progress (5%)
  • Chaos Titan Legion - In progress (0%)
  • Chaos Navy - COMPLETED
  • Terrain/City - COMPLETED
  • Scenarios/Background - In progress
Completed Epic Table

Still a ton of work ahead of me - but I can honestly see the light at the end of the tunnel. One of the great things about Epic is how satisfying it is to paint entire units in a single sitting. At this pace - I just might complete this project before the next re-release of the game!

Wednesday, July 8, 2009

Filling Gaps in Metal Models

Well, I'm making incredibly slow progress on my fiend. As to not be too boring, I present some progress photos with instructions on filling gaps with green stuff.


The biggest problem with metal models is that the joins aren't as tight as plastic models. I guess it's just the nature of the beast. Above you will see one of the joins that has been pinned and glued in place. It should be a nice strong bond, but it's pretty ugly.


I usually start this process by rolling out a thin rope of green stuff (the thinner the better).

Here's your first tip: When working with any polymer putty (green stuff, brown stuff, grey stuff), have a smooth surface on which to work. I use a piece of plastic that used to be the front of a picture frame.

There are several reasons for this. It protects your work surface. This is especially important if work on a wooden desk or some other porous surface. The putty doesn't stick to very smooth surfaces very easily like it does to porous ones. Also, it's easier to thoroughly clean this surface before every use. Putty will pick up dust and grit on your work surface and this will show in your final product. Instead of being smooth, the putty will be gritty.

Anyway, after I've rolled out my rope on a suitably smooth surface, I apply it to the gap.

Then I pull out these...

I've heard them called a lot of of things but the set I have calls them "colour shapers." I've also seen them labeled clay shapers. My set was made by Royal Sovereign and I'm not sure if anyone else makes them. I got the idea to use them from this project log on Warseer.

Green stuff barely sticks to the smooth, silicone tips, so they're great for moving putty around and especially smoothing it.

I take the colour shapers and begin to smooth it into the gap. It became pretty obvious pretty quickly that I had used way too much green stuff (see my notes at the end).

I used my hobby knife to trim the excess putty away from the gap and went back to smoothing.


After several rounds of smoothing and trimming, I have a nice smooth transition. At least I hope I do. The moment of truth will come when I actually paint the thing!

Notes:
I bought my colour shapers at Dick Blick and there's plenty of info on their website. This is not an endorsement of this store. It just happens to be close to my office.

I bought the mini set of 5 (Soft, Size 0). While very little sticks to them, you can get even better performance if you keep them wet while using them (you could just lick them). Keeping your tools wet, is a fundamental step when using putty

When working with Green stuff I always find that I mix way too much. I've gotten better and better at it. A tip I read recently on From the Warp suggests estimating the amount you'll need and then make only half of that. you can always mix more if you need it, but if you mix it and don't use it, you're just wasting.