Showing posts with label terrain. Show all posts

Thursday, February 19, 2015

Scenery for Sale! Lovingly Crafted Scenery Here!

Some things have come up and I need money quickly so I'm going to try and purge my scenery collection for virtual cash. Some of these pieces have been with me for as many as 10+ years. Some of them were documented originally on my old blog, Redemptors of Golinar, when I moved to Chicago in 2006. But here I sit in my new home of Milwaukee and I need cash for a multitude of bills, so they have to go.


Small Shanty: This shack was built for an Ork themed shanty town when I first moved to Chicago in 2006. Plasticard, rock, sand, and something out of the inside of an old computer. $25.00.


Storage Tank: Built in Buffalo, NY in 2002 or 2004, I'm not sure exactly when, but this piece has seen many battles over the years. CD-R spindle, Plastruct, brass tubing, card, and a Leman Russ handle. The foamcore base was added in early 2009. $35.00


Chimney Stack: Built around 2006, this piece is built out of foamcore, cardstock, sand, and a fax paper tube. $25.00


Shanty Garage/Mek Workshop: This piece combines an "Ork tent" with little workshop off of the back. The piece features an Imperial Guard dozer blade, Citadel barrel, some off brand modular piping/ladder, Plastruct, sintra, corrugated cardboard, sand, and even paper towel soaked in glue. $40.00.


The Great Pinnacle: This piece stands just under 16" high in truly epic grandeur. I love this piece even if its a pain to store. Its actually large enough that a Stompa could use it for cover. It was built in Chicago in early 2009. I even found the blogpost from when I "finished it." I actually later went back and added weathering powders when I got them in like 2012.  Foamcore, foam insulation, sand, and a lot of spackling. $35.00


Gateway Spires: One of my favorite types of pieces to build are the pieces of scenery that create a pathway. I love the visual of it. Anyway, the taller of the two spires stands 10". Built in early 2009 in Chicago out of foamcore, foam insulation, sand, and spackling. $25.00


Mid Spire: This spire is a little smaller, still coming in at 11" tall. It features two mated foam spires on a built up base. Built in Chicago in early 2009. Foamcore, foam insulation, sand, and spackling. $20.00


The Pinnacles Set: Buy the whole Pinnacles set for $75.00 so they don't have to be separated from their friends.


Desert Scrub Forest: The scrub forest. Natural broom bristles, foamcore, foam insulation, sand, and spackling. $25.00

thirdxparty@hotmail.com if you want to pick some things up. Prices do not include postage.

Thanks for reading.
-Nick

Tuesday, January 20, 2015

Now Accepting Commission Scenery Work


Top quality detailing on a Skyshield Landing Pad I did for Next Dimension Games in Chicago. It now resides with the Brohammer Gaming Club in Chicago.

I am currently accepting commission terrain work. Nothing brings our beloved hobby to life like beautiful scenery to play on. I've been building and painting scenery for a long time dating back to my old gaming store Adventures Unleashed in Buffalo, NY during the mid 90's and working for GW in the early 2000's at GW#108 in Buffalo.

I can quickly take the resin and plastic terrain you've been collecting for ages and turn it into gorgeous table top scenery. 

Over the years my scenery and terrain painting skills have adorned Transit Station and Jester's Cap (now Two Kings) in Buffalo, NY, Next Dimension Games in Chicago, AdeptiCon's 40K Warzone Tournament, and photo quality scenery for box art used by Hyacinth Games/Wreck-Age.

I'll gladly combine kits to give more personality to your terrain. This Cities of Death building was based with GW Moonscape Crater to give the appearance it took a direct missile hit.


More GW scenery painted for Next Dimension Games. 40K Ammo Crates on a Realm of Battle board.

Hyacinth Games has commissioned me to paint most of their resin terrain for photo use.

The resin tents and campfire were quickly and affordably painted for Hyacinth Games.


You'll get more for your dollar by having me paint the terrain you already own, but I can building something custom completely from the ground up.


Custom urban arch built as a centerpiece for my home Cities of Death board. This piece has been used in the 40K Warzone Tournament at AdeptiCon in 2013 and 2014.


4'x4' trench board built specifically for the 40K Warzone Tournament at AdeptiCon. It is currently available for sale.

I can do everything from quick game play ready to photo ready depending on your needs and budget. Contact me here: thirdxparty@hotmail.com

Thanks for reading.
-Nick

Friday, November 22, 2013

New Scenery at Next Dimension Games


Back in October Next Dimension Games commissioned me to work on their store terrain. This is a smattering of what I've been working on.

One of the first pieces I worked on was a pair of Imperial Bastions. I don't have any pics of those today, but I did photograph the servo-shrine piece that comes with it.I put more time in than maybe I should have. All of the lenses are gemmed, details like skulls are picked out and highlighted, and I even did caution stripes on the base and some bird poop,
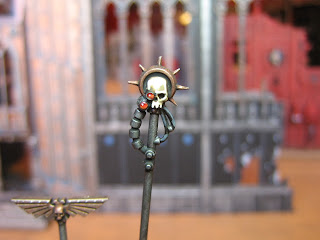
Here's the servo-skull that hovers up above it.
Here are some classic crates dating back to the 2nd Edition 40K box era. You can see liberal use of weathering powders on the pallets.
Tank traps done up very similar to the ones I use on my own tables. You can see a bit of the Manufactorum in the background.
This is the inside of said Manufactorum and uses the Manufactorum kit, a Moonscape crater, and an Urban Barricade and Wall, all from GW. You can see a WIP Shrine of the Aquilla in the background.

As a parting photo, here's the top of one of the two Sky Shield Platforms I've done up for them.
There's plenty more where that came from. I didn't picture any of the work started by other staffers that I've gone back and completed/updated. Stop in the store, check it out, play games on them!

Next Dimension Games 2934 N Clark, Chicago, IL.

-Nick

Saturday, April 13, 2013

40K Warzone Smoke & Fire

Two of the warzones have rules for smoke and/or fire so representations were needed. In this strange box of dirty cotton balls are 24 smoke markers that have LED tea lights at the base to make them "fire". I stole the idea from other blogs and I really like the look they produce. These were really easy to make too. I do need to make 16 more though.

Wednesday, March 27, 2013

40K Warzone Tournament: Zone Mortalis Room

Just a brief snapshot today. Here's a picture of one of the rooms from one of the Zone Mortalis boards. Proceed with caution in this room.

Monday, January 28, 2013

My Mind Is Blown: Rob Hawkins

This morning, rather than talking about my own work I want to talk about someone else's. I spend a lot of time looking at other blogs. I know there are people who do the exact same thing. There are blogs I check daily, like DaveTaylorMiniatures.blogspot.com because I kind of obsess over his creativity and output and then there are others I check periodically like Stahly's taleofpainters.blogspot.com because I just like to look at pretty miniatures and they deliver the goods.

I had stumbled passed RobHawkinsHobby.blogspot.com through a link on Dave Taylor's blog and for a while he was working on a sort of cartoon-ish looking castle for Wrath of Kings that was extremely well executed, but not my style. I'd do a quick scroll through the pics and then move along. Then I ran into this:
This picture is of a wild west building with a futuristic power generator on the side. The generators actually light up and are made out of LED Tea Lights.
Considering the quality of the other terrain in this post, and the fact that I had just bought 20 Tea Lights to use in my Adepticon projects, his blog had my full attention. Also, this painted neon "light" effect is just fantastic.
Yesterday I stumbled into his shots of the building interiors and was absolutely floored.
That's the inside of this building. Go check out his blog to see how the saloon splits into 2 sections for miniature photography opportunities:
Seriously, as a terrain nerd, this guy's work makes my head explode and I'm sick with envy. Oh wait, the jail is fully detailed too:
In fact, its a fully detailed wild west town.
But of course, this isn't all he's done. I decided to look at his terrain gallery and stumbled upon the trench board he had made. It just so happens that I need to make four 4'x4' trench boards for Adepticon and though I won't be ripping this off exactly, I will no doubt be borrowing some ideas from it:
If you are an obsessive terrain nerd like myself I highly recommend checking his site for inspiration. His work is fantastic and I look forward to following his blog in the future. RobHawkinsHobby.blogspot.com Back to own work later today.

-Nick

Saturday, December 29, 2012

Building a Better City from the Ground Up Part 2

In the last article I talked about how I've wanted to take the Cities of Death experience and make it feel more like you're battling in an actual city rather than a haphazard maze of buildings and detritus. I started off the project by discussing the movement trays that I built to contain my buildings. Today I'm working on painting some of those movement trays so lets take a look. Now I will note that this is all probably much easier with an airbrush but since my first attempt airbrushing something a few years ago was a complete failure, I haven't touched it since. Instead, I do layers of over brushing and dry brushing combined with washes to create the look of my sidewalks. Here's a quick overview:
To start I painted the entire base with black paint. I did this by hand because spray paint would melt my exposed foamcore sides.
Next I over brushed dark grey. I used Americana brand Graphite colored craft paint. Essentially its Abaddon Black mixed with a lighter grey.
 Next I dry brushed Apple Barrel brand Blue Stoneware over that. Think something along the lines of The Fang - a dark blue/grey.
Then I dry brushed again with Apple Barrel brand Country Grey. This is more of a black based grey akin to Dawnstone or Administratum Grey.
This next layer was a mix of a bunch of colors to approximate Bleached Bone/Ushabti Bone.
To help pick out the sidewalk blocks and add a level of realism I washed Gryphonne Sepia into the cracks though any brown wash would do.
To strengthen that definition and add more detail to the gravel patches I then washed the cracks and gravel with Badab Black/Nuln Oil.It should be noted that the dark grey dome will get hit with some sort of metallic and highlighted but this movement tray is essentially done. 
This is the layout of this particular tournament board. As you can see there are an assortment of different sized trays in various states of completion. Essentially there are two that need the full treatment starting with over brushing/dry brushing, and the rest just need various levels of detailing.
Here's a close-up of a major intersection. The two lane highway has Imperial Eagle decals for added effect, and the narrower street actually has little red arrow decals to show the direction of traffic. The crosswalks and lane dividers are not actually painted on either. They are strips of card stock I glued down because I didn't feel like messing with stenciling them on. To blend it all together various greys were stippled over the lines and decals.
You'll notice in these pictures shading in the gutters. I washed Badab Black along the gutters and added some random staining in the streets. As I work along other splashes of black, brown, and green wash will be added to represent various types of street filth. 
What do you think so far? Does it feel more like a cityscape?

In part 3 I'll talk about detailing the buildings and stretching the value of your Cities of Death buildings. Thanks for reading. -Nick